Growing Cannabis With Homemade Fertilizer
Article written by

Dipak HemrajHead of Research and Education
Many premade fertilizers are available on the market, but some prefer to make their own at home. If you’re interested in growing cannabis with homemade fertilizer, you must familiarize yourself with three specific letters: N, P, and K.
These letters stand for the nutrients nitrogen (N), phosphorus (P), and potassium (K). Most fertilizers contain these essential nutrients and sometimes contain micronutrients like zinc, copper, and other metals. You need to keep this in mind when making homemade fertilizer, so you do not end up with a lack of nutrients.
You will also need the right composition of fertilizer for different growth stages. During the marijuana plant’s vegetative stage, you will need more nitrogen. But, in the flowering stage, you will need more phosphorus and potassium and less nitrogen.
It is also important to not add too much fertilizer during growth and to not add any nutrients or fertilizer during the last week of growth to flush the nutrients out of the plant and improve the final product’s flavor.
Let’s take a closer look at why good fertilizer matters and how to make your own.
Get your medical marijuana card
Connect with a licensed physician online in minutes.

The Importance of Good Fertilizer
Good fertilizer is necessary for growing great cannabis plants. If you make and use good fertilizer, you can ensure stronger roots and plants, which ultimately increases the final product’s flavor and experience.
There are two main types of fertilizers: organic (which is what we’re discussing here) and inorganic, which is made from synthetic or mined minerals. There are also three main ways to fertilize your plants:
- Liquid nutrients and additives mixed in with water
- Powdered nutrients and additives mixed or sprinkled in soil
- Liquid fertilizers and additives with the nutrients diluted in water and then sprayed on your plants
Download Free Guide to Plant Nutrients
How to Make Your Own Cannabis Fertilizer
Making your own fertilizer or compost seems difficult, but it is not as hard as it sounds. All you need are food scraps and some other natural foodstuffs and items that can provide you with all the nitrogen, potassium, and phosphorus you need to begin growing cannabis.
To make good compost, you need a 50:50 mix of materials that are rich in nitrogen and carbon. A good rule of thumb is, for every bucket of green material (e.g., grass clippings and tree leaves), mix with a bucket of brown material (e.g., soil, wood chips, stems).
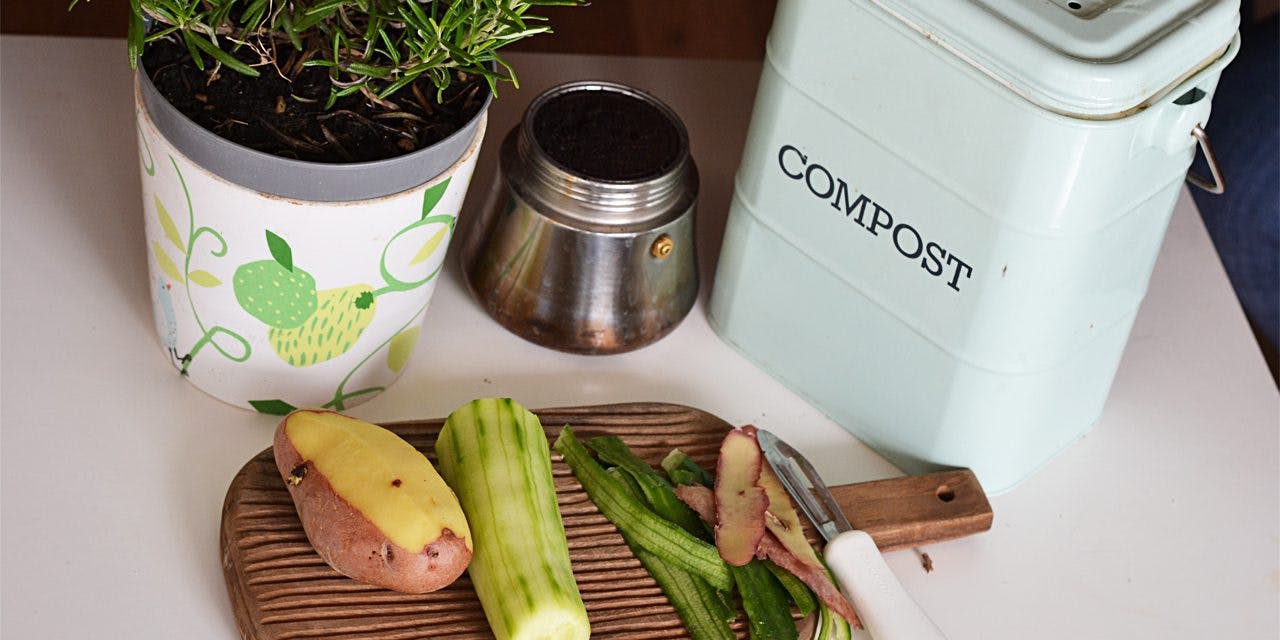
You can start by adding dry materials like dry soil or dried grass clippings to a compost bin, which you can buy at any gardening store. Once you’ve added your dry materials, add wet materials like coffee grounds, table scraps, tea, fruit peels, etc.
Over time, the microbes in your compost pile will break down all the materials and make nutrient-rich soil that is perfect for plants of all kinds. Keep your compost mix neither dry nor overly moist. Water your compost and add more wet materials to add moisture when it’s too dry; add dry materials if too wet.
To make a non-compost fertilizer (which is not a replacement for compost), you can make your own solution:
- Place four tablespoons of processed poultry manure, bat guano, or blended dry organic fertilizer into a quart jar.
- Fill with lukewarm water.
- Screw on the lid and shake vigorously, then keep it at room temperature for two days.
- You will then be left with a strong solution that can be diluted as necessary and sprayed over your plants.
- Be careful, though, and dilute well, as you do not want to overfeed your plants.
Items You’ll Need
You do not need very many items to start composting and making your own fertilizer. You need:
- A compost bin
- Dry soil
- Wet, organic materials like fruit peels and table scraps
- A sunny space, ideally outside or in front of a window with plenty of light
- A garden form to turn and aerate your compost heap
Things to Add to Your Compost Bin
The following are great additions to your compost bin:
- Grass clippings: A great source of nitrogen.
- Fallen leaves: Again, plenty of nitrogen.
- Weed tea: No, not tea made with cannabis, but a solution of ¼ weeds pulled from your garden and ¾ water soaked for about two weeks. You will then be left with a brown liquid that looks like tea that is filled with nutrients for your compost bin.
- Kitchen scraps: Citrus peel, banana peel, unused parts of vegetables, eggshells, bones, etc. These can add nitrogen to your compost and micronutrients like calcium.
- Tree leaves: These can help retain moisture in the soil and are rich in trace minerals that can help your plant grow. They can also attract earthworms, which can keep your soil aerated.
- Earthworms and earthworm castings: Earthworms can aerate your compost, whereas their castings can add nutrients to the soil.
- Manure: Manure can add acidity and nutrients to your soil. Be careful, though. Manure can be too rich in nutrients, overfeeding your plant and leading to nutrient burn (“nute burn”).
- Coffee grounds: These can also be used to add acidity to your compost.
- Banana peels: These can add potassium to your compost.
You can vary proportions to get different nutrient profiles for different stages of your plant’s growth.
Things to Avoid Adding
Avoid adding the following to your compost bin:
- Tea or coffee bags: The grounds are OK, but not the bags they come in.
- Dog or cat manure: Their waste often contains microorganisms and parasites that can damage your soil.
- Too many citrus peels: Some are good, but too much can make your compost too acidic, destroying microorganisms in the soil and no longer attracting earthworms.
- Fish and meat scraps: They tend to attract pests.
- Glossy or coated paper: These don’t decompose properly and can leach chemicals into your compost.
- Coal fire ash: It contains too much sulfur and can make soil overly acidic.
- Sawdust from treated wood: Sawdust from wood treated with pressure treatment, varnish, stain, or paint can leach chemicals into the soil.
- Sticky labels from fruit and vegetables: These are not usually biodegradable.
- Large branches: They do not break down quickly or easily. Use smaller branches for your heap instead.
- Synthetic fertilizers: These can end up killing microorganisms in your compost and soil.
When Is Homemade Fertilizer Ready for Use?
Homemade fertilizers (specifically, compost) must decompose fully to be used. This can usually take between two and six weeks. The fertilizer will be dark brown and should smell of damp earth.
The Bottom Line
Homemade organic fertilizer is definitely worth making, and it is a technique worth mastering if you want to grow organic cannabis. It is especially useful if you want to grow cannabis outside and keep synthetic fertilizers away from your garden, as these can end up harming the ecosystem overall. Good compost does not have any such danger.
Download Our 7 Page Guide to Growing Cannabis
Get Your Medical Card
Connect with a licensed physician online in minutes.
Frequently Asked Questions
Is homemade fertilizer better than commercial fertilizer?

One advantage of commercial fertilizers (and we recommend using organic commercial fertilizers) is that they are readily mixed and prepared for you in exactly the ratios of NPK and other micronutrients you need for different stages of plant growth. This can make feeding your plants a lot easier and less time-consuming.
However, inorganic commercial fertilizers should be avoided, especially for home gardens, as they can end up harming the environment by killing the beneficial microorganisms in the soil and greatly diminishing soil quality.
How much fertilizer do you need to start growing?
Generally, less is more, especially if you are growing in soil or soil-coco mix. In general, marijuana fertilizer should be applied at least once weekly, along with an ample supply of pH-balanced water (distilled water, as other types of water may contain extra minerals you do not need).
You want minimal or even no fertilizer during the seedling stage. Then, during the vegetative stage, a fertilizer of NPK ratio 2:1:2. During flowering, little-to-no nitrogen, sometimes with a ratio of around 1:2:2 or even 0:3:3
How long does it take for cannabis to grow?
This depends very much on the type of cannabis and growing method, but anything between two months (indoor grows using the sea of green method) and six months (outdoor grows). The seedling stage usually lasts a week, the vegetative stage between 2-6 weeks, and the flowering stage between 6-14 weeks.
Indica varieties and Cannabis ruderalis tend to mature much quicker — between 6-9 weeks. Sativa varieties usually have much longer flowering periods — between 10-14 weeks.